Connect Blogger to Google Search Console: Step-by-Step Guide
 Kamran Liaquat ali
- posted on
- No Comment

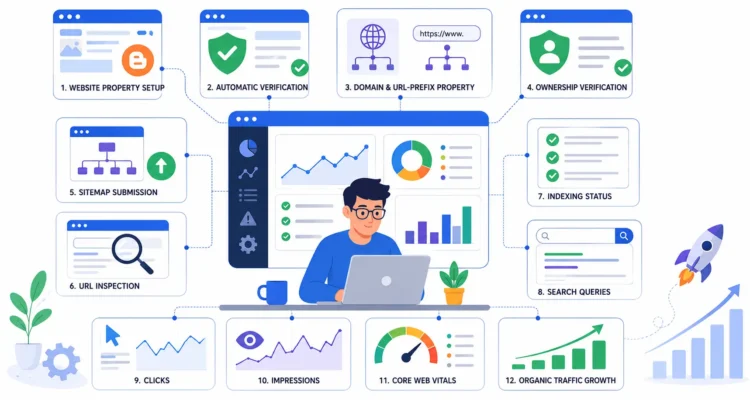
Quick answer: Open Google Search Console, add your blog as a URL-prefix property using its exact address (for example https://yourblog.blogspot.com/), verify ownership (Blogger blogs owned by the same Google account are often verified automatically; otherwise use the HTML tag method), then submit sitemap.xml and sitemap-pages.xml under Sitemaps. Data starts appearing within a few days.
Before You Start
- Make sure your blog is published and Visible to search engines is on in Blogger settings.
- Turn on HTTPS and HTTPS redirect so you add the secure version of the address.
- Sign in to Search Console with the same Google account that owns the blog, if possible.
Our Blogger settings guide covers these settings in detail.
Step 1: Add a Property
In Search Console, open the property menu and choose Add property. You will see two options:
| Property type | When to use it |
|---|---|
| URL prefix | Best for blogspot.com addresses and most Blogger blogs. Enter the full address exactly as it appears, including https:// and www if your custom domain uses it. |
| Domain | Only for a custom domain where you can add a DNS TXT record at your registrar. It covers every subdomain and protocol. |
Step 2: Verify Ownership
If Search Console does not verify the blog automatically, choose HTML tag. Copy the meta tag it shows, then in Blogger go to Theme → Edit HTML and paste it directly after the opening <head> tag. Save the theme and click Verify in Search Console.
<meta name="google-site-verification" content="your-unique-code" />Keep the tag in place permanently; removing it can unverify the property.
Step 3: Submit Your Sitemaps
Go to Indexing → Sitemaps and submit:
sitemap.xmlfor your postssitemap-pages.xmlfor static pages such as About and Contact
A status of Success means Google read the file. It does not guarantee every URL will be indexed.
Step 4: Inspect Important URLs
Paste a post URL into the search bar at the top of Search Console to run URL Inspection. It shows whether the page is indexed, the canonical Google chose and any problems. For a new, important post you can click Request indexing, but there is no need to do this for every post; the sitemap handles discovery.
Step 5: Use the Reports That Matter
| Report | What it tells you |
|---|---|
| Performance | Queries, clicks, impressions, average position and click-through rate |
| Pages (Indexing) | Which pages are indexed and why others are not |
| Sitemaps | Whether Google can read your sitemaps |
| Core Web Vitals | Real-user speed and stability problems |
| Manual actions and Security issues | Penalties or hacked-content warnings |
Common Problems and Fixes
| Problem | Fix |
|---|---|
| “Verification failed” | Check the tag is inside <head>, the theme was saved and you added the exact URL version |
| Sitemap “Couldn’t fetch” | Wait a day and resubmit; confirm the blog is public and visible to search engines |
| Pages “Crawled – currently not indexed” | Usually a quality or duplication issue; improve or merge thin posts |
| Pages “Discovered – currently not indexed” | Google knows the URL but has not crawled it yet; strengthen internal links |
| No data in Performance | New properties take a few days to collect data |
Frequently Asked Questions
Is Search Console free?
Yes, Google Search Console is free for any site owner.
Do I need Google Analytics as well?
They do different jobs. Search Console shows how you appear in Google Search; Analytics shows what visitors do on your site. Most bloggers use both.
How long until my Blogger posts appear on Google?
Often a few days to a few weeks for a new blog. Helpful, original posts and good internal linking speed things up.
New to Blogger? See how to create a Blogger blog, then continue with our blogging and SEO guide.
